Pzem power meter
PZEM-004T V3 power meter
For a while, I’ve had a higher than average power-bill, and I have for years suspected my PC to be part of the blame, however it is hard to know what exactly is using power when, and how much.
I decided I wanted to monitor how much power I was using at my desk, which includes a work-station for soldering and electronic projects, and a desktop with some monitors. I found the PZEM-004T V3 power metering device, and decided to base my metering devices on this
PZEM-004T V3
The PZEM-004T V3 is a power metering device by innovatorsguru. It offers pretty accurate measurements of:
- AC voltage
- AC current
- Power
- Frequency
- Power factor
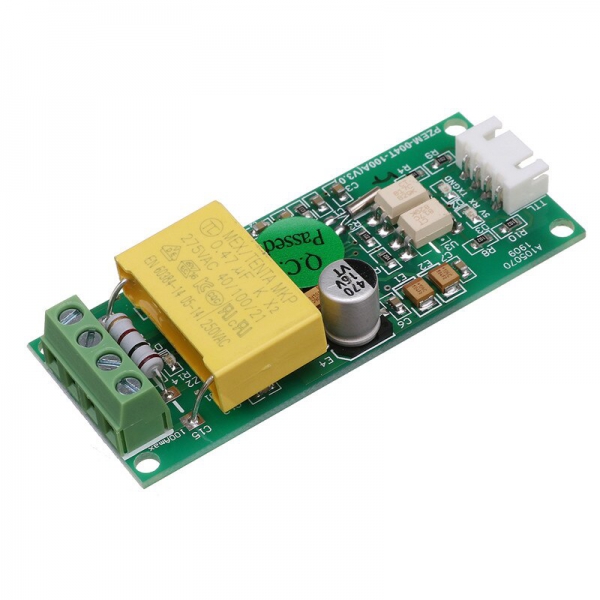
It’s fairly inexpensive, and I got mine from aliexpress.
This module comes in two variants. One with a 10A current shunt on-board, limiting the max current
to 10A, or a version that instead uses an external current-transformer (CT) to measure the current draw.
For me, the reduced complexity, and increased sensitivity of using a 10A ranged device outweighed the
increased range of the CT based devices.
The PZEM modules communicate over Modbus on UART. The communication is isolated using two opto-isolators This means you have good galvanic isolation between the power and logic sides of the board, however it also means the logic side needs to be separately powered.
Power supply
Finding a nice and cheap power supply was no small task. I bought a few different models on aliexpress, and you very often do get what you pay for.
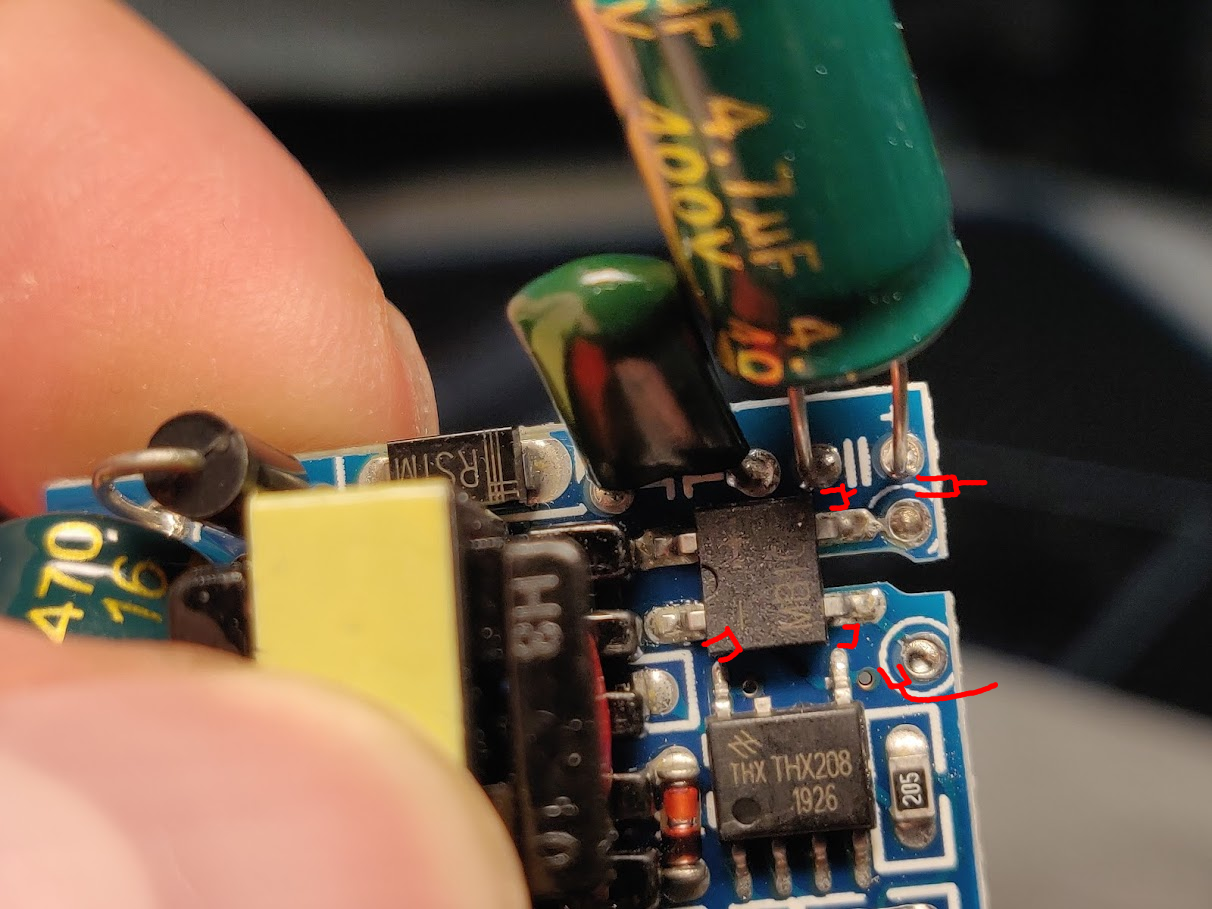
First module I bought had so bad clearance that I didn’t dare run it unattended, and I only used it for setting everything up, while I waited for better parts.
Next I decided to try and look at a brand I’d used before. Hi-Link. I had previously used their HLK-PM01 module for different designs, and they are nicely potted
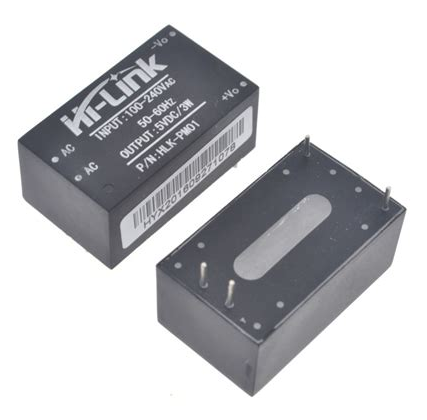
Notice how the potting compound entirely fills the module, and can be seen in the holes on the bottom plate.
Well, I needed to use a 3v3 module for this setup, and I didn’t need the 3W power of the PM01, so I decided to see what else hi-link offered, and ordered some HLK-2M03
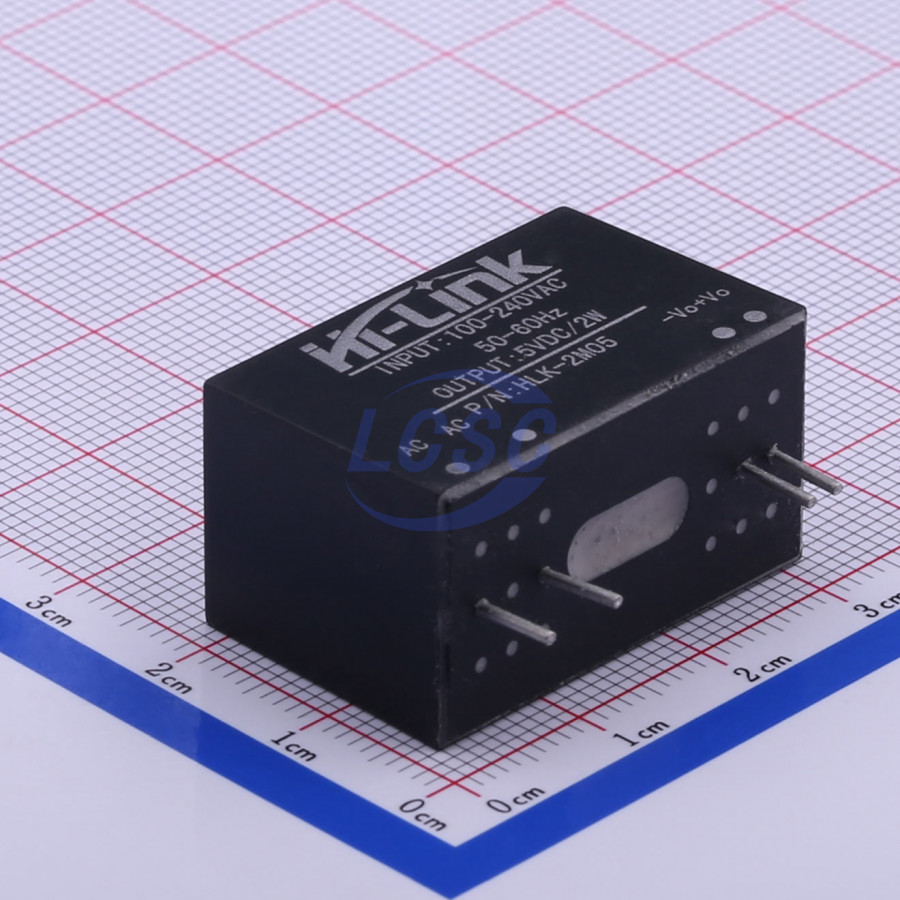
Now while the ones pictured on LCSCs webpage also have the nice, fully potted module as clearly visible in the image, the ones I got on aliexpress… did not.
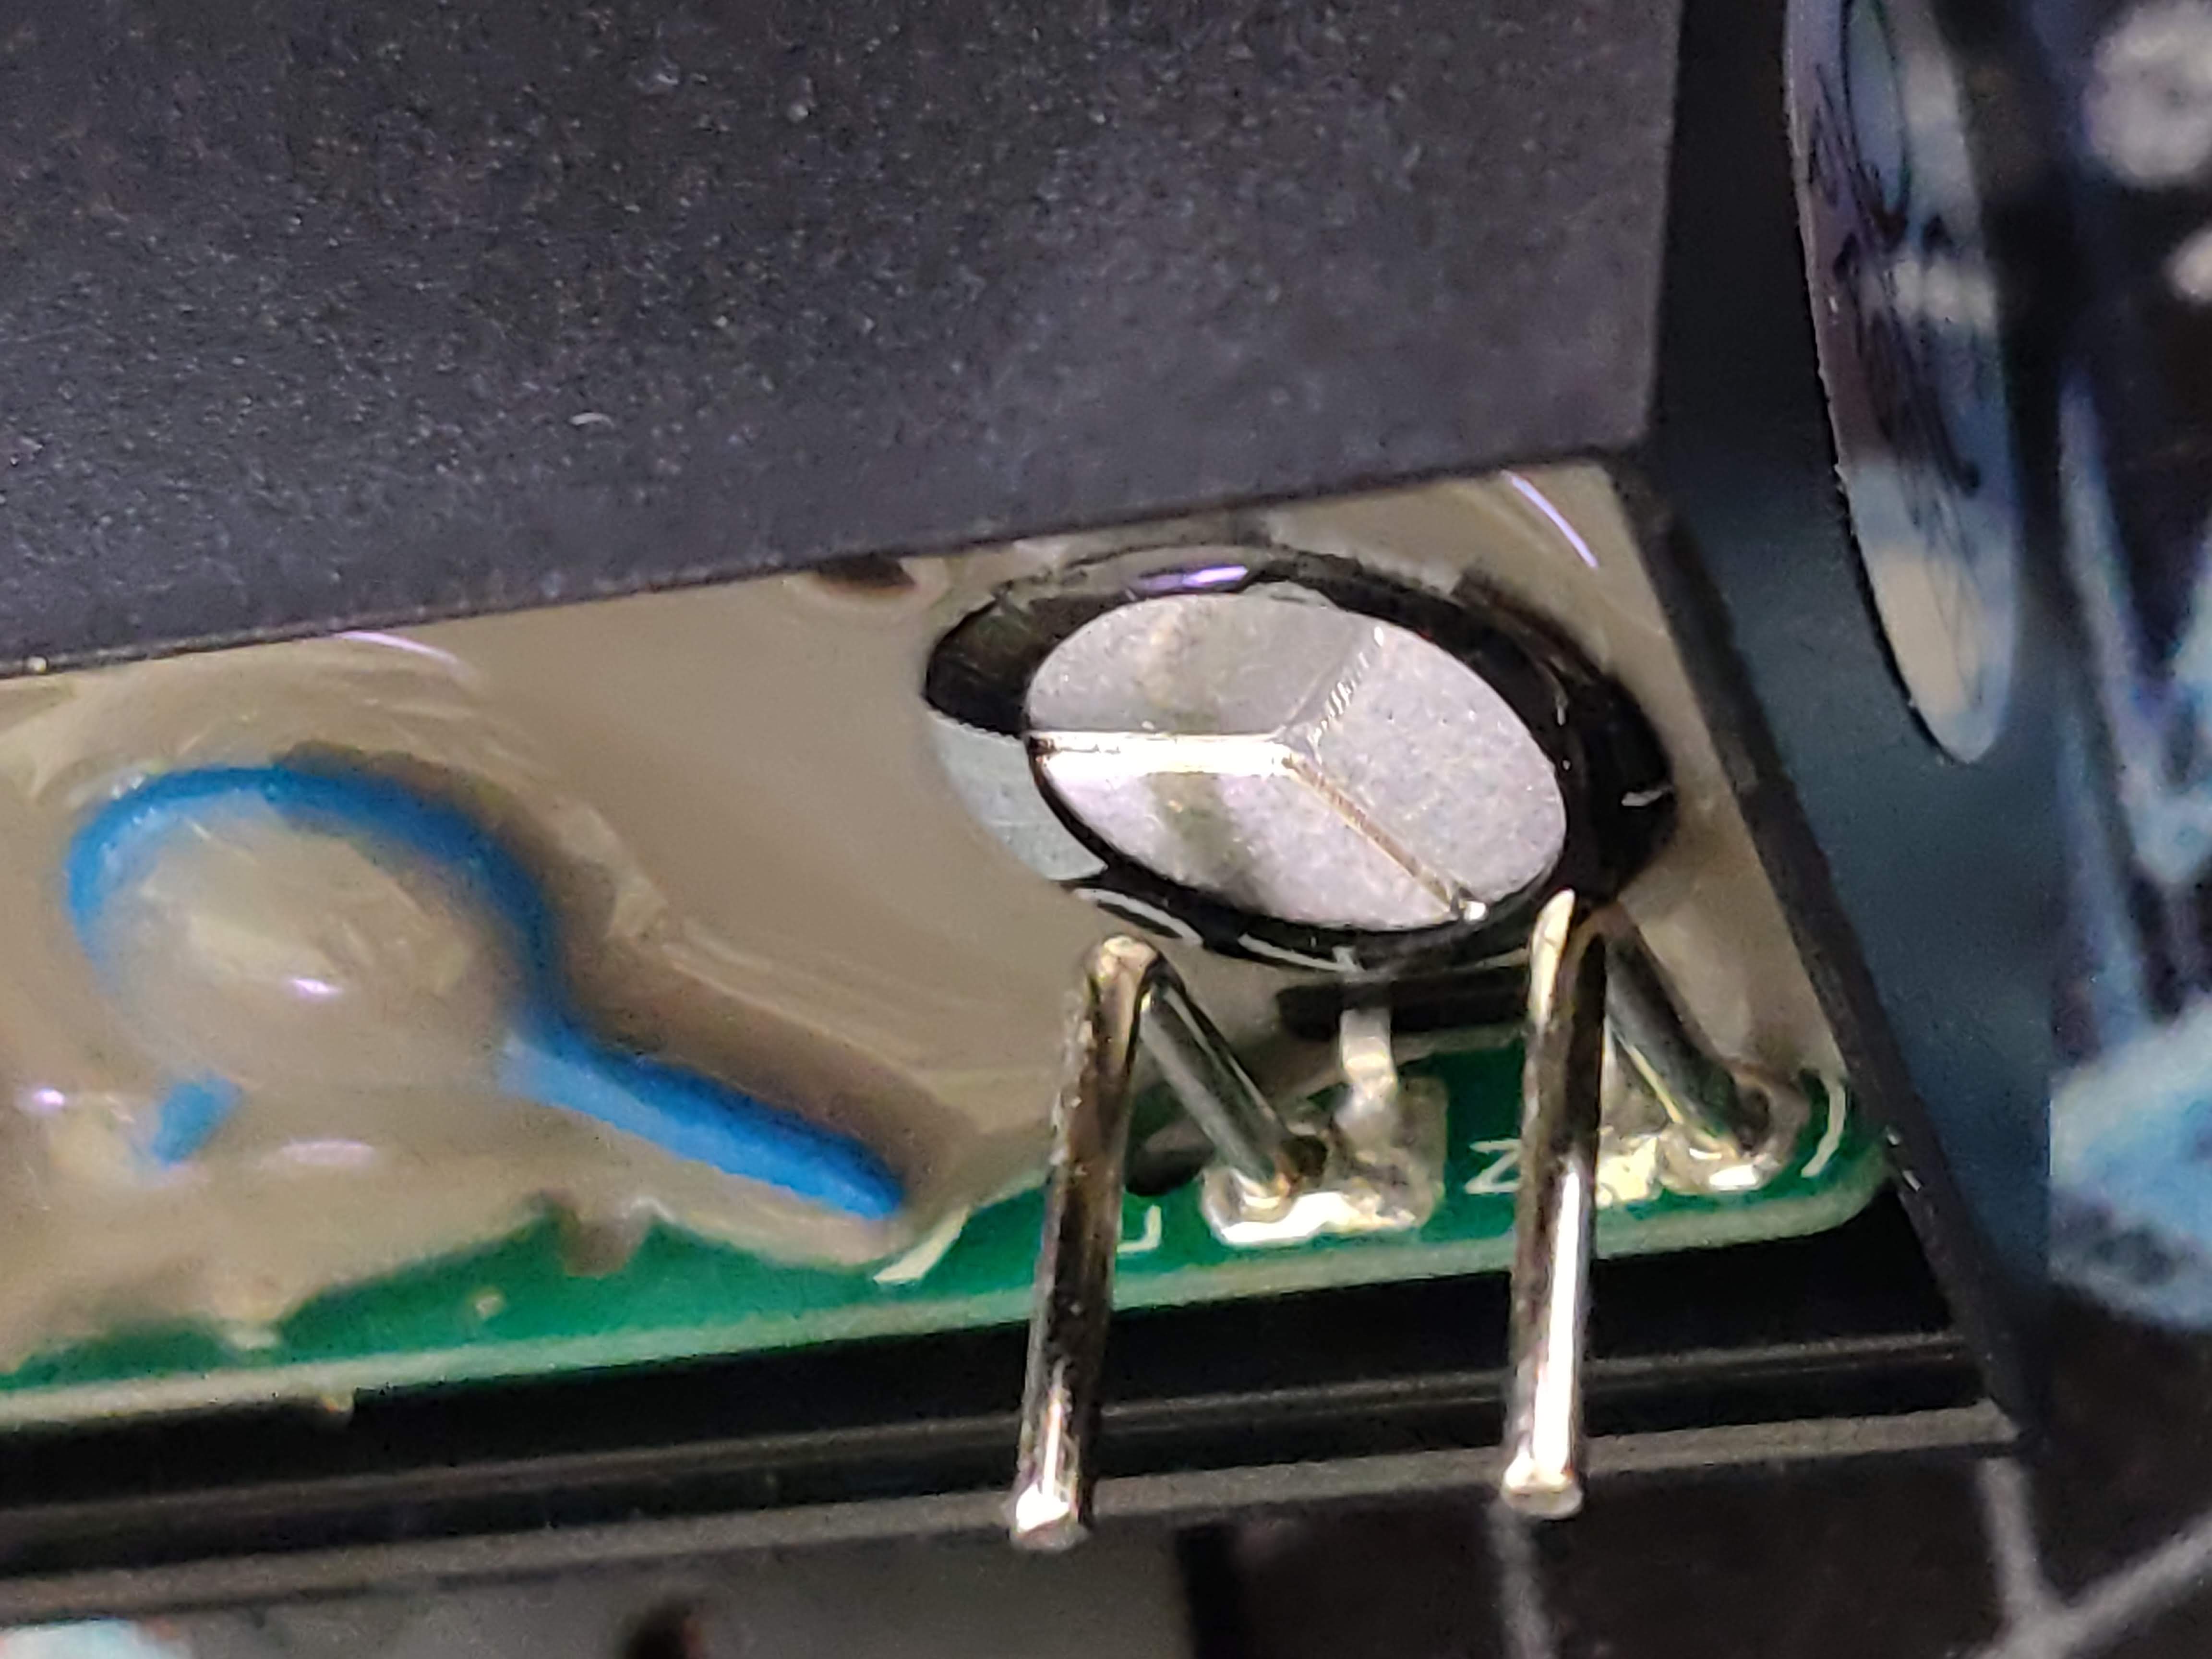
In fact, removing the bottom plate was easy, and what I found wasn’t exactly great. While this would work, there was only a mm or two between the mains live leg, and the can of the mains input capacitor, which means only a mm or two between two points that would have ~325v between them 100 times a second.
I am not sure if this is a different package, a faulty batch, or just downright a clone of the Hi-Link modules, but I decided to not use these either.
The chosen one
I ended up going with a SANMIM SM-PLG06A
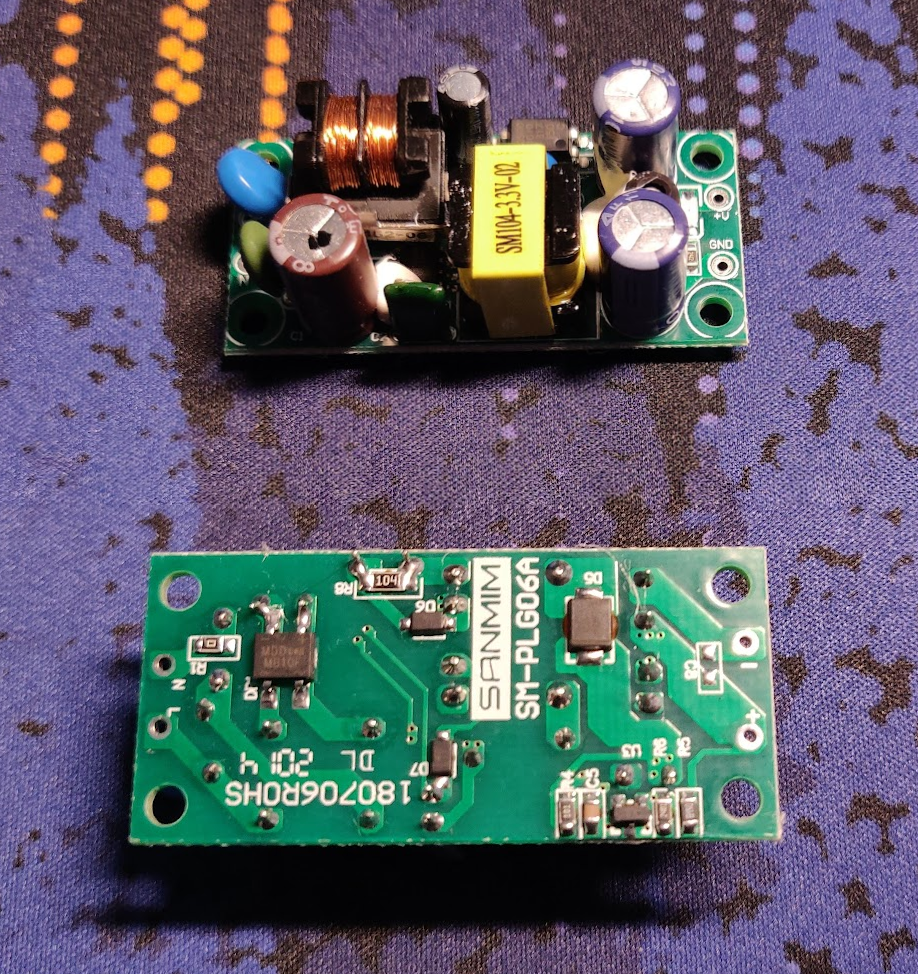
While there’s still not miles and miles between high voltage traces, there’s enough that I’m comfortable running this long term. It also has nice separation (assuming the transformer is wound well) between the HV and LV sides.
Now with the saga of the power-supply, it’s time to figure out what to pick to talk to the PZEM module
The MCU
A good sensor is always a nice thing to have, but if you can’t easily get the readings from it, what good is it really? So we need some sort of MCU that can talk modbus UART with the PZEM, so pretty much anything.
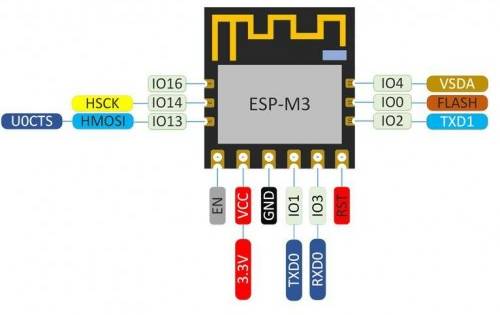
As I like datalogging everything I can, I run a homeassistant server at home, and as such the MCU should be able to log to HA. This makes something compatible with Tasmota or ESPHome the obvious choice, and I decided to go with the cheap and tiny ESP-M3 module.
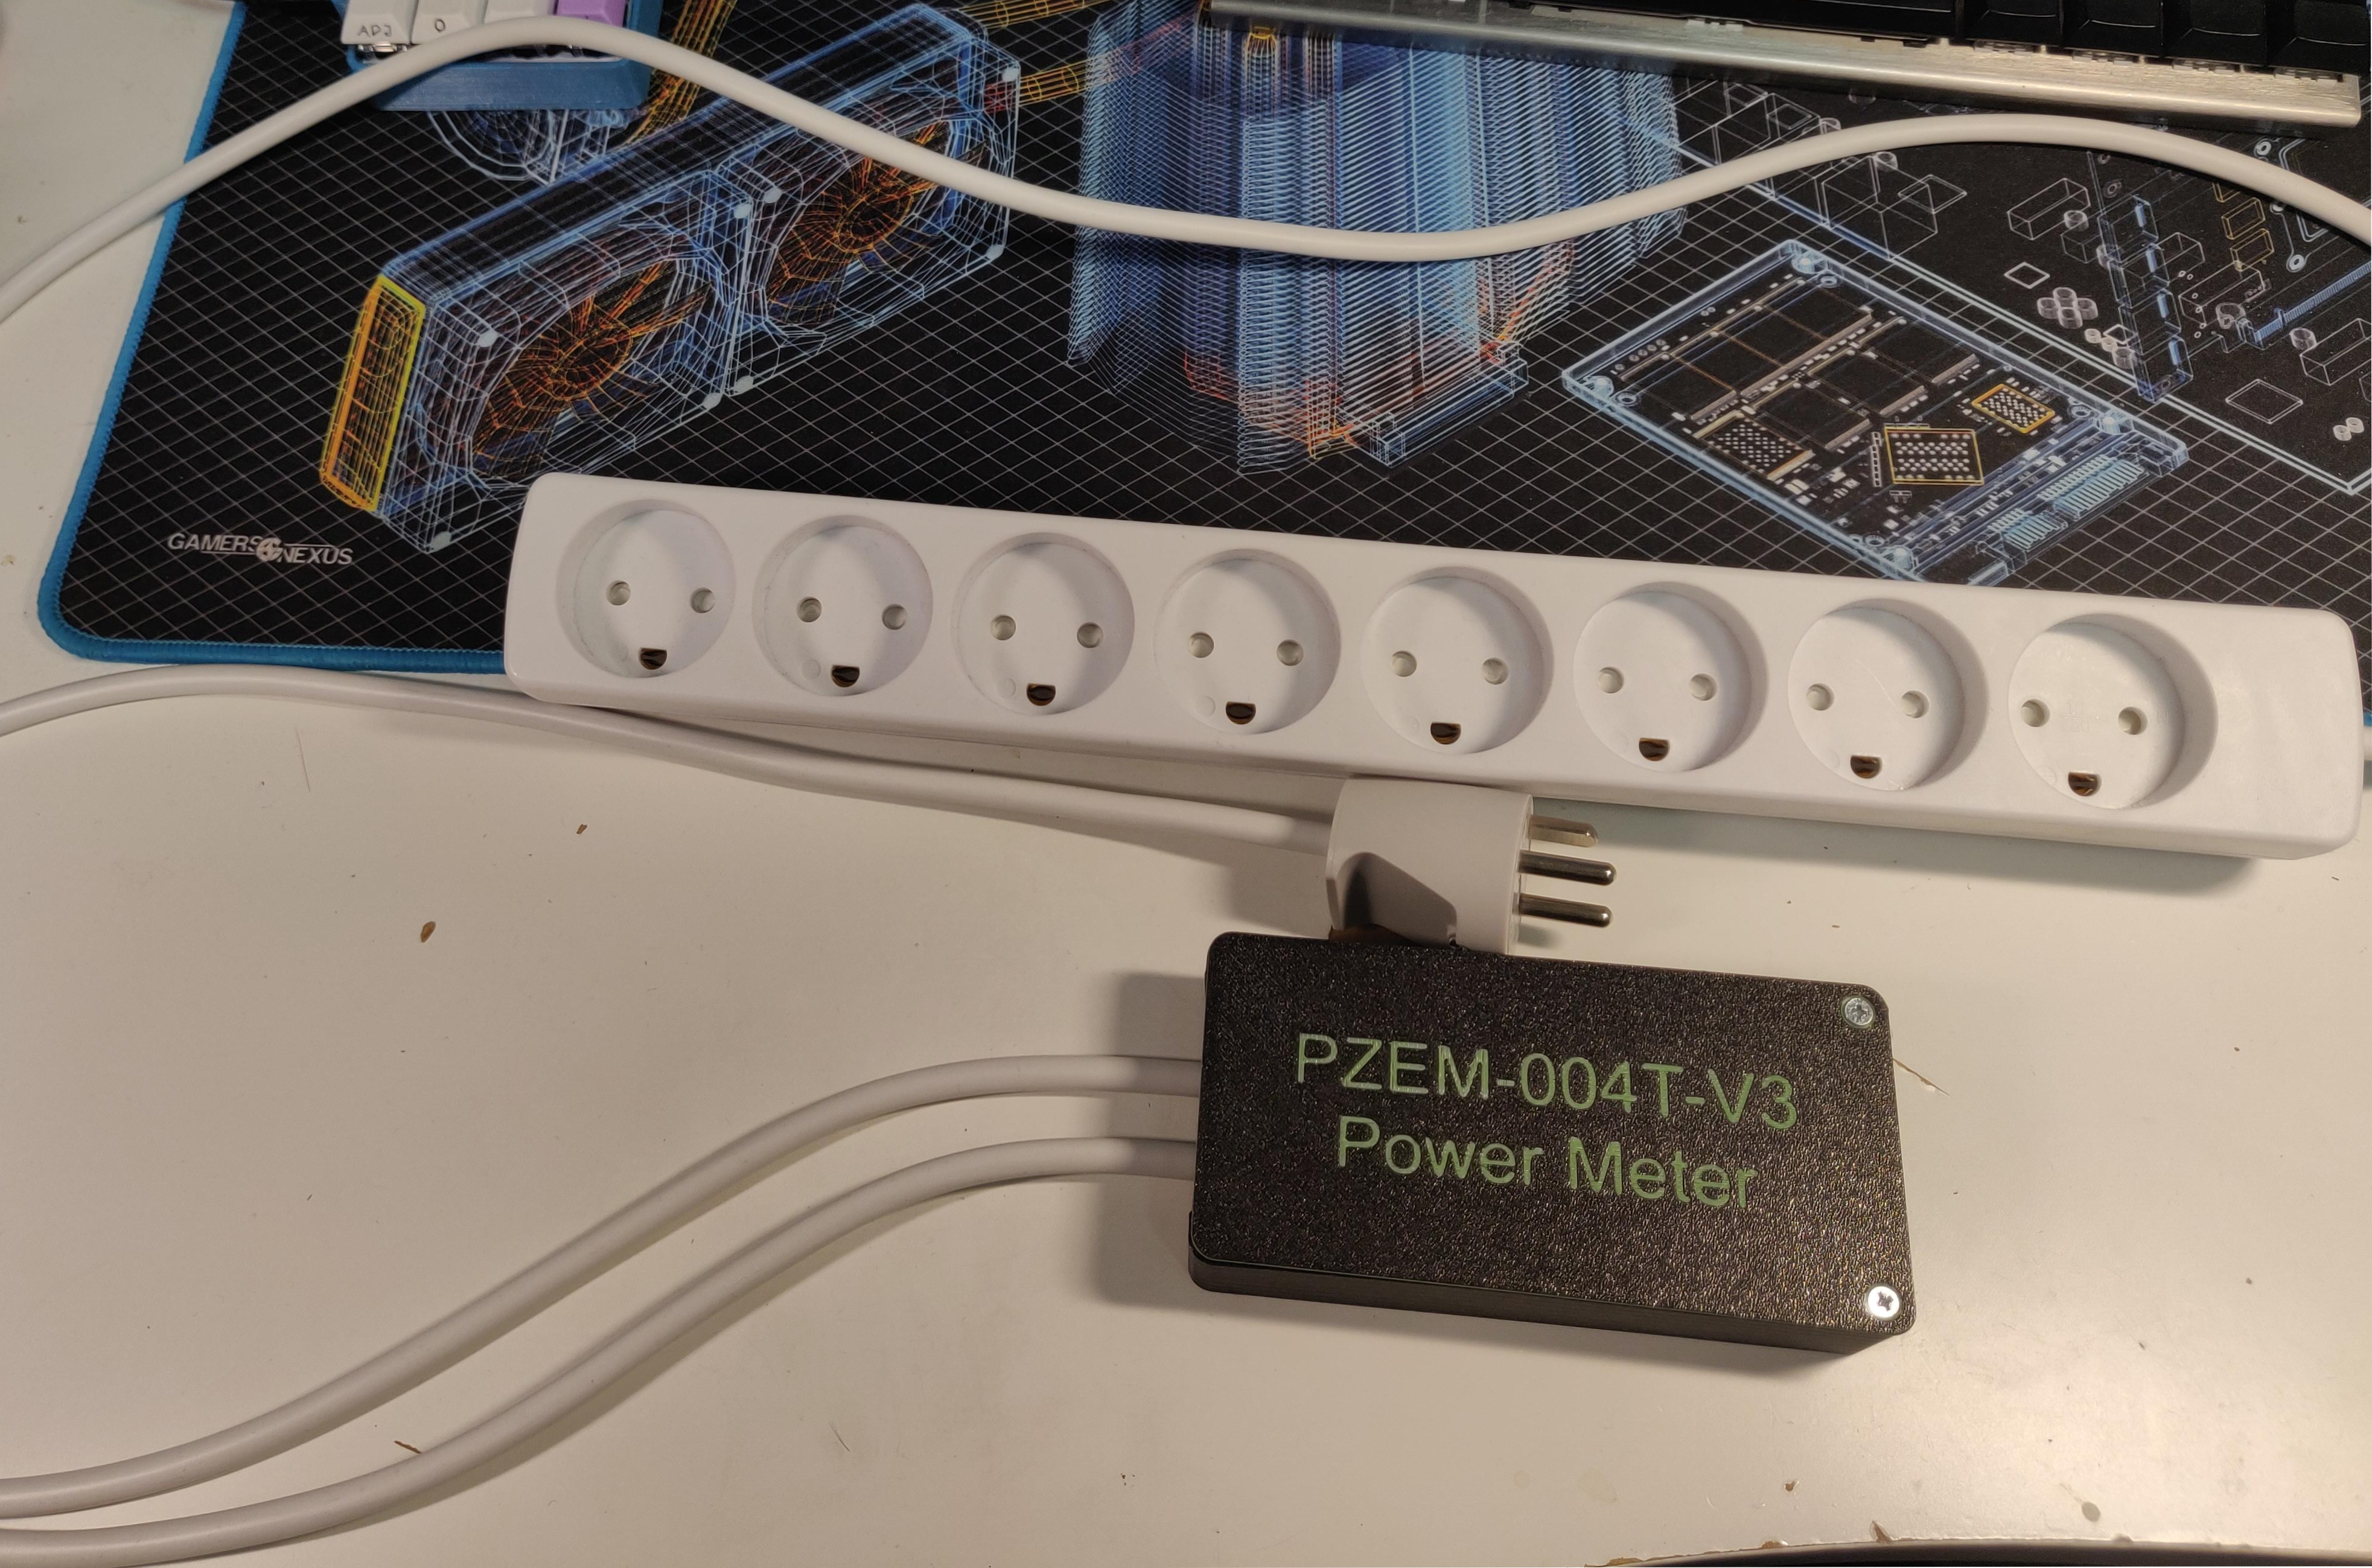
The box
All together it looks like this
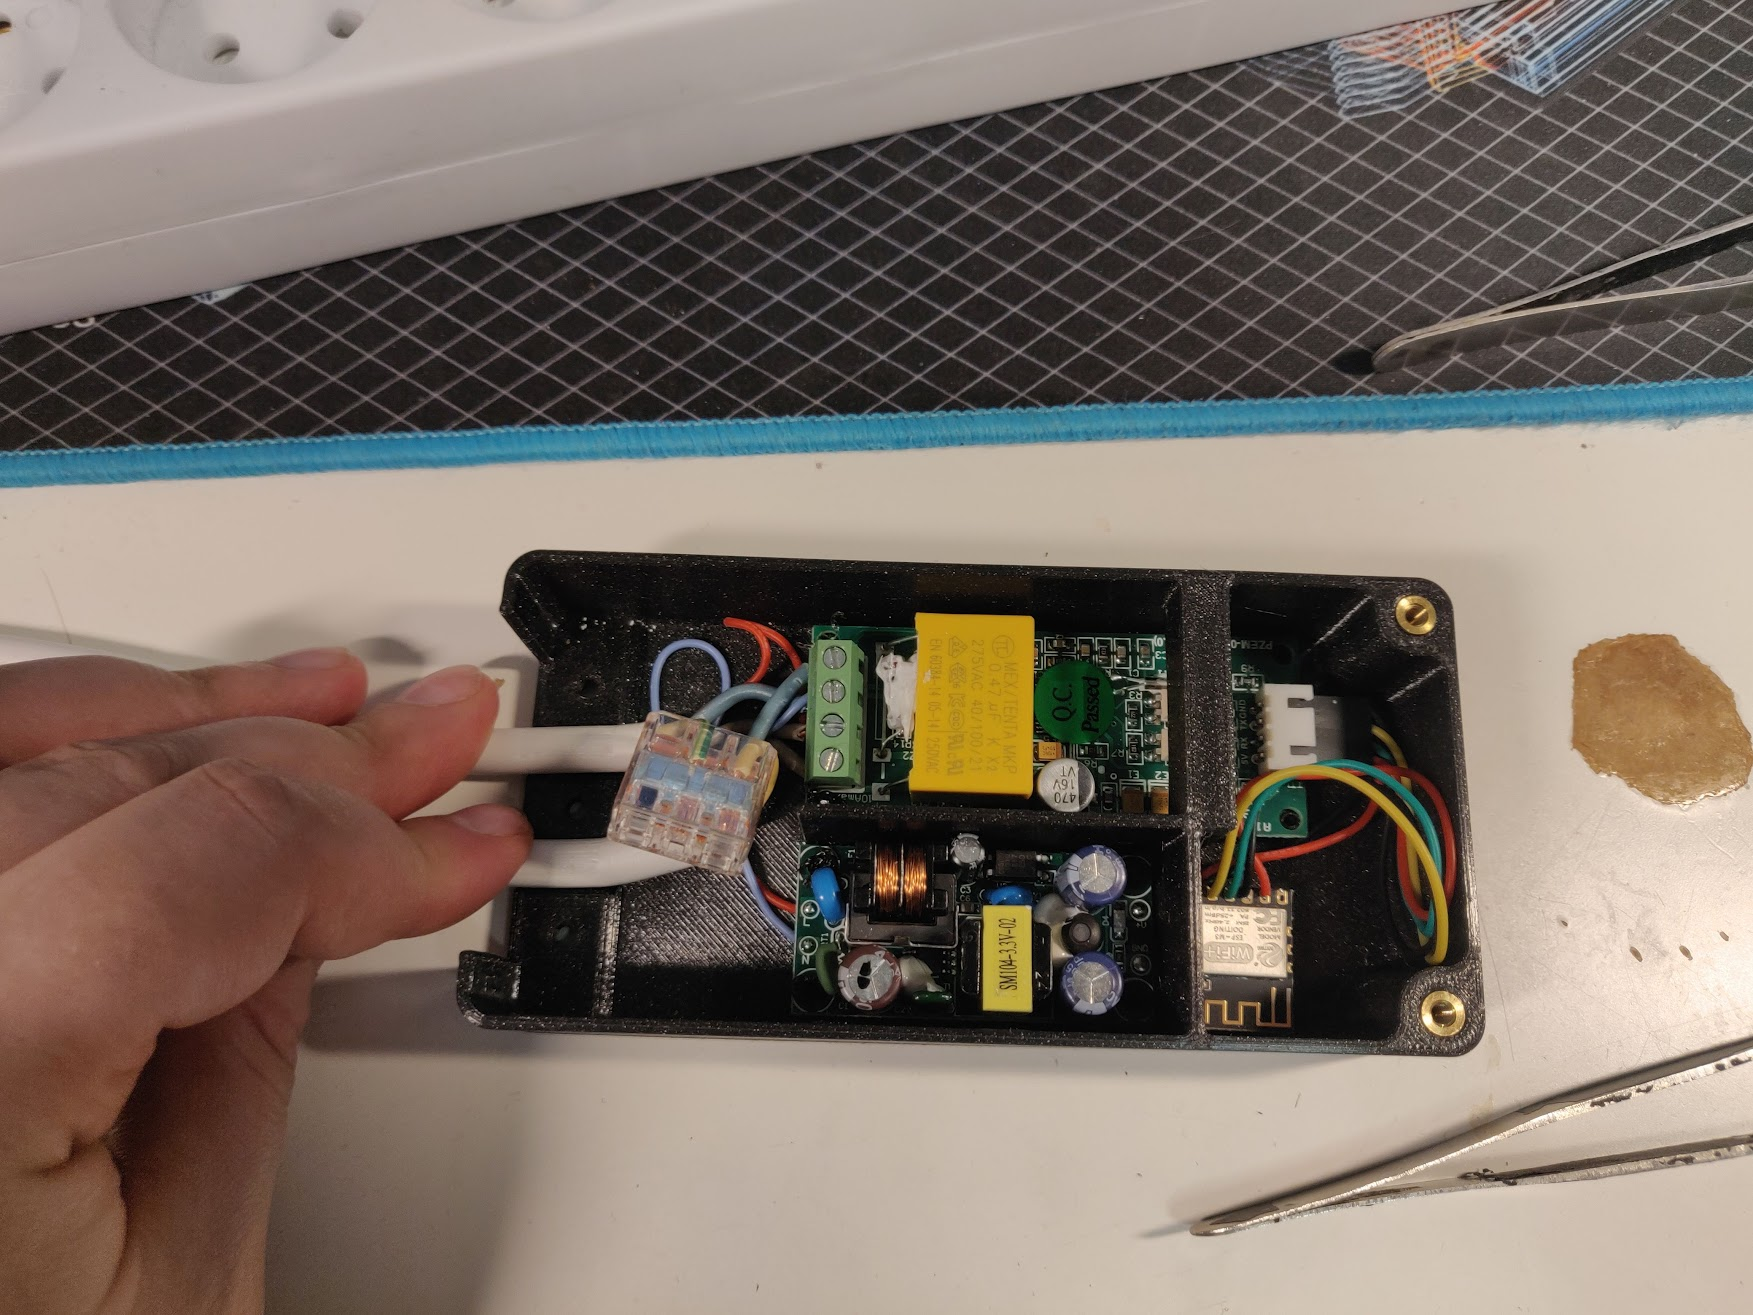
The design choices when designing the enclosure, was that it should be compact, but not so compact
that it’d be annoying to use.
There should be enough room to comfortable connect the power and load cables, with enough room for
a wago block for the grounds.
The case should also ensure good strain relief, and clamp on the mains cables.
Lastly, and importantly, the box should not have any user accessible metal, that was in any way
connected to parts inside.
Notice also that the HV and LV sides are separated as much as possible, with the only things crossing the separation being the DC side of the PZEM module, and the 3.3v power cables from the PSU.
Firmware
With the hardware selection figured out, it was time to make it do something

For this I decided to use ESPHome, as I really enjoy the YAML defined nodes and the ESPHome build system. The automatic debug logging over WIFI, and rock solid OTA built into ESPHome is just so nice to have, and it integrates effortlessly with homeassistant.
ESPHome also already supports the PZEM-004T v3 module as the pzemac
esphome:
  name: pzem_power_meter_1
  platform: ESP8266
  board: esp8285

wifi:
  ssid: !secret wifi_ssid
  password: !secret wifi_pass

  # Enable fallback hotspot (captive portal) in case wifi connection fails
  ap:
    ssid: "Pzem Power Meter 1"
    password: "hunter2"

captive_portal:

# Disable hardware logging to free up the uart
logger:
  baud_rate: 0

# Enable Home Assistant API
api:
  password: !secret esphome_api_pass
ota:
  password: !secret esphome_ota_pass

uart:
  rx_pin: 3
  tx_pin: 1
  baud_rate: 9600

sensor:
  - platform: pzemac
    current:
      name: "PZEM 1 Current"
    voltage:
      name: "PZEM 1 Voltage"
    power:
      name: "PZEM 1 Power"
      id: "PZEM1_power"
    frequency:
      name: "PZEM 1 Frequency"
    power_factor:
      name: "PZEM 1 Power Factor"
    update_interval: 5s
As you can see, a fairly simple setup, and voila! it’s available in homeassistant.
After setting up some cards in my HA dashboard, it looks like this
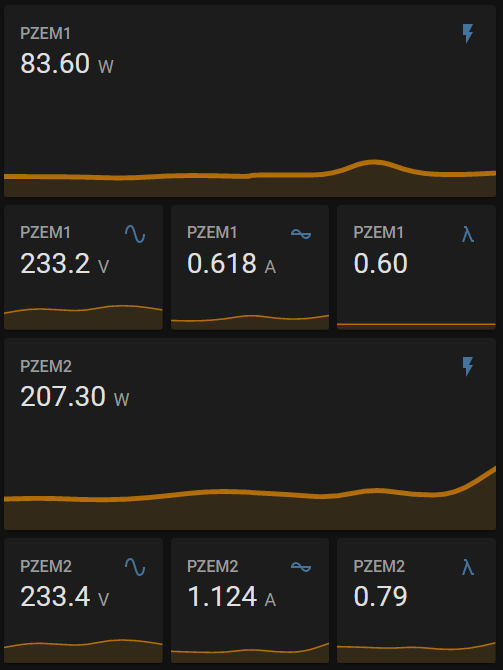
Yeah my monitors and misc. have some pretty shitty power factor (PZEM1) :/
Project files
For this project I designed a couple things. To design the case I made some basic 3D models of both the PZEM module and the power supply They’re both available through the above grabcad links, but as grabcad requires you to have an account, they’re also available directly